Drone mapping is an awesome hobby to get into, you get enjoy the outdoors, try different flying locations all the time and use the technology to produce useful, actionable deliverables. It's not always a pleasurable experience, most of the time it's a real challenge but that's what sets it apart from normal RC flying and that's why I love it.
I am by no means and expert in any of the below areas - I just like to consider myself a 'drone enthusiast', and as such I'm sharing some of my experiences so that new comers to the hobby may get into it faster, with less hassles and more successes.
There are four main factors to consider:
- Air frame
- Sensors
- Flight Planning
- Image Processing
I'm not going to pitch this article at a reader that knows nothing about RC or drones, this is focused on the hobbyist or prosumer that is interested in doing aerial mapping and has some understanding of drones, model flight and the regulations in your region.
 |
| View from my hexacopter doing a mapping mission of the family's chestnut farm |
Small Drone Mapping - Airframe
When most people think of making a decision on an air frame they usually think along the lines of air frame type, i.e fixed wing vs. multi rotor. Each air frame certainly has its differences as well as some very distinct pros and cons. I'll give you an overview of them below. Also, once you have decided on the type of air frame another important decision to make is whether to build or buy. As an addendum to this article I've included my thoughts on this topic.Multi rotors are generally more expensive with shorter flight times, however they will produce a more detailed map (albeit smaller) because they can fly lower, slower and usually with a lot more stabilisation for the camera. The big players in the consumer multi copter game currently are DJI Phantom, 3DR Solo, Yuneec Typhoon H and Walkera Tali H500. Any one of these products will give you most of the tools you're going to need to create great aerial maps. Other great features of multi copters is that they take-off and land vertically therefore can be flown in tighter places, they are often very compact and are easily transported and they have built in safety features (such as GPS hover) that make them very easy to fly.
Fixed wing mapping drones almost always have longer endurance than their multi rotor counterparts, the down side to a fixed wing is generally they are harder to fly and need a larger take-off/landing area. There are of course exceptions to all of these (the Sensefly eBee is fully autonomous and needs no flying experience) however as a general rule for fixed wing drones the user needs to be able to take-off and land them, with the autopilot doing everything in between. Fixed wing drones can be less expensive than multi rotor, however most fixed wing drones are targeted to the professional user (the Parrot Disco would be the only prosumer fixed wing drone I know of at time of writing) and are therefore equipped with more a robust air frame and superior sensors. However it's certainly possible to build your own prosumer grade fixed wing drone for around $600 with a bunch of plug-n-play hobbyist quality parts.
So to give you some real world mapping examples, if you wanted to produce a topographic map of Farmer Brown's 60 hectare property, you could do it with a multi copter (if you had about 2hrs and 6 spare batteries) or you could do it with a fixed wing in one 20min flight! This will produce a nice orthomosaic (aerial image) as well as give you elevations/contour lines however if you want to send him a 3D model of the property then the trees will look like rubbish and the structures will look ok. This is because you are only getting a nadir (top down) view and the post-processing software can only do so much with a top down view when generating a 3D model.
Now let's go and see Builder Joe to create a site survey of his 5 hectare job site. Try doing this with a fixed wing and you'll not only find that the 3D model is not that good (because above mentioned reason) but also you'll fly the mission in about 1min. You'll also find it impossible not to overfly onto the neighbour's property and very difficult to take-off and land. However vertically popping up your multi rotor, taking oblique images with your gimbal stabilised camera using the 'structure scan' auto mission built into most mission planners and you'll be done in about 15min. This will produce a very accurate 3D model, even just using an action camera such as a GoPro.
 |
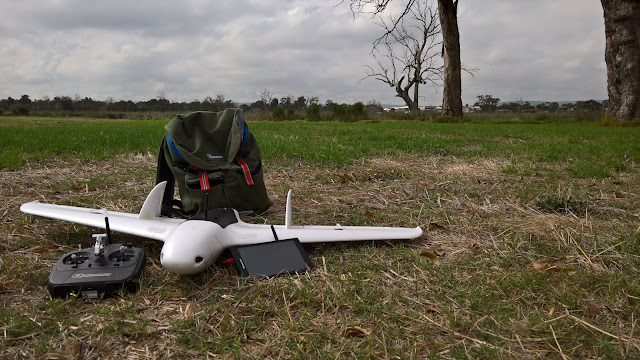
| Aero Scout fixed wing drone with controller plus tablet for mission planning |
Small Drone Mapping - Sensors
At this stage drone mapping is all about photogrammetry, there are technologies such as LIDAR that are increasing the capabilities of small drones however at the moment they are still limited in range and are heavy (needing a larger air frame to lift them), high quality cameras are producing very good results.Action cameras such as the GoPro are 'ok' for aerial mapping. Whilst being light and relatively cheap, their short comings are that they have lower resolution (around 12Mp), low shutter speeds (1/30 sec), image distortion from the fish-eye lens and have what's called a 'rolling shutter' which the post-processing programs don't particularly like so much. With all of that said, mount one to a gimbal for stabilisation, fly them slow on a multi copter and lower to the ground and they can produce excellent prosumer grade results.
The big guns in mapping are the compact cameras such as Canon Powershot S120 and Sony Cybershot WX500. They are heavier than action cams and need larger gimbals (if mounting on multi rotor) however they have high resolutions (16Mp +) and very high shutter speeds, this means they can be used in fixed wing air frames moving fast and low to the ground and still produce high quality, blur free images. The results from using a sensor such as a good quality compact camera will usually be of a professional standard. Also (for Canon users) there is an excellent 'hack' called CHDK that unlocks a bucket load of extra features from the camera that make them great aerial mappers.
One of them is an intervelometer, this is basically a timer that makes the camera take a photo every 2 sec (or 5 or 10 etc) for as long you like, this is a feature that usually does not come with the camera. Taking aerial photos using this kind of method is simple and effective but does have it's shortcomings. If the camera is taking photos based on a time interval then you will end up with more photos on your up-wind leg (because the aircraft has a slower ground speed) and more on your downwind leg. As long as you have sufficient overlap then it's not a big problem but there is a better way. CHDK also allows the autopilot to talk to the camera so it can trigger the shutter based on distance. So with this method, regardless of the ground speed, you will end up with a photo taken every 50m or 70m or whatever you program. This will result in a more even spread of photos across your mission area.
Once you have mastered 'visual light' cameras you'll most likely want to start expanding on your offering by looking into other sensors such as multi-spectral, LIDAR and thermal imaging cameras. These have many uses and seem to be expanding exponentially, examples such as crop health monitoring, structural scanning, infrastructure inspection and emergency first responders are just some of the applications. Checkout sensor providers such as MapIR, Sensefly Sequoia and Workswell for more information on these sensors. Also DJI and 3DR are just bringing to market turnkey solutions with their products.
 |
| Walkera Tali H500 with GoPro 4 mounted on a 3 axis stabilised gimbal, ready for a structure scan |
Small Drone Mapping - Flight planning and Mission Execution
The methodology is where each individual pilot gets to showcase their abilities; this is where the most variables occur and where a skilful mapping pilot will shine.Most flight planning software does the same job, it enables the user to program a flight path for the drone to follow during it's auto-mission. The main feature to be looking for is the ability to easily produce a survey grid based on an outline or polyline. I've used Mission Planner, APM Planner 2.0 (which is available on both PC and Mac) as well as Droid Planner and 3DR Tower apps. For highly detailed planning I'd recommend using one of the desktop based planners, they simply have more features. But I mostly use Tower app, as it has enough features for what I need, it very simple and streamlined to use and is an app so it works on a tablet/smartphone which I find much more convenient to use in the field.
The fundamentals of photogrammetry are to always get a decent overlap on all your images; you need forward lap as well as side lap for the post-processing program to be able to function correctly. Generally you should have 60 percent overlap both ways as a minimum. If you decide you want extra forward lap then increasing the rate at which the shutter is released (take a photo more often), or fly slower. If you want more side lap then you'll need to fly a grid pattern with less distance between each grid line, this will mean a longer flight but more detail in the end result.
Those are the fundamentals, but each mission is different and usually in a different location. There's many other factors that need to be managed and decisions made; best take-off and landing site (both multi rotor and fixed wing need this although have different requirements), best vantage point to able to watch the drone fly it's auto-mission (you need to be able to see it at all times). Authority regulations, no-fly-zones, obstacles all need to be considered, plus optimising the flight plan due to weather conditions.
Geotagging your images is the next most important step. You can do this by using a camera that already has a GPS built-in (however they are heavy and lack a few basic features) or you can use a GPS logger to record and log the flight. What most drone mappers do though is use the logs from the flight controller's GPS and sync them with the photos taken. It's a tricky and tedious extra step that needs to be taken but there are a number of geotagging tutorials that will walk you through the process. For extra accuracy, and if you have the equipment, you can also add GCP's or ground control points to your map. With the right gear this means you can take your map that might have an accuracy of 5-10cm right down to 1cm which is right up there with professional surveying.
 |
| Using Tower app for flight planning ... note my overlap should be more! |
Small Drone Mapping - Image Processing
Of course the original images are what is going to make your end result. A more stable air frame, a higher quality sensor and good methodology will give you the best chance of producing something high quality, but the real magic is what happens during the image processing phase.There are some great programs to choose from and there's new ones starting up all the time. Some of the well known ones are Agisoft Photoscan, Drone Deploy, Maps Made Easy, Pix4D and DDMS. I've used them all for various missions but right now I use Event 38's DDMS for producing my maps. I find it very easy to use, produces some of the best maps and has a free trial.
 |
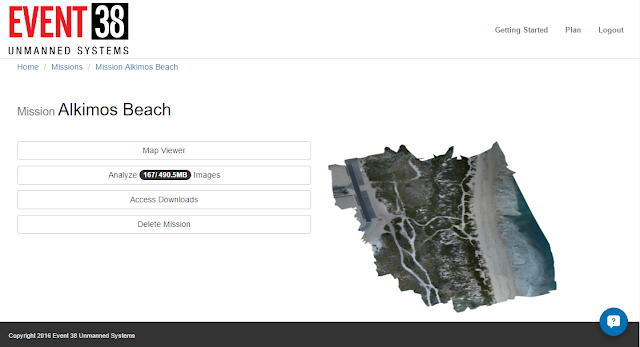
| Dashboard screen in DDMS showing details on aerial mapping mission |
For some of my missions I have been in a location with no Internet connection, this is where a local program installed on a laptop enabled me to process the missions' images and create both an orthomosaic and 3D model. Also I have had incidents where I have been able to produce a better 3D model using a trial version of Agisoft Photoscan than that the remote services could offer.
The remote services though are very easy to use, once you have uploaded the images the rest of the work is done for you, this also means you can process multiple missions from the day all at once. Often I have been delighted to see a finished 3D model waiting for me in the morning after uploading the night before.
 |
| A 3D model of a primary school that was generated in Agisoft Phoscan and uploaded to Sketchfab |
So I'm hoping that the above information is going to be of assistance, I found that there's a great deal to learn with aerial mapping and I've tried to pass on as much as I can with this article.
A lot of the links I have provided in this article are to the more popular and well marketed service providers in the industry. I do encourage you to seek out other drone businesses that can help you on your journey; there are plenty out there.
 |
| The Aero Scout performing pre-flight checks |
------------------------------------------------------------------------------------------------------------------------------------------------------------------
Time is Money
At the start of this article I promised to give some insight into whether to buy or build your own drone. I have experience with both, purchasing my Walkera Tali H500 and building my own fixed wing drone.With the skills I learnt setting up my hexacopter, using mission planner and flying multi copter drone missions gave me the confidence to build my own drone. Because of the shortcomings of the multi copter I decided to build a fixed wing drone, this has cost me a fraction of what it would cost me to purchase a fixed wing drone from someone such as Event 38 or 3DR. However it has taken me 10's of hours to build it, test it and develop it, even though I purchased and installed 'plug-n-play' parts and had a good understanding of the process. This equates to weeks and months of building and testing, at times it has been a slow and frustrating journey where all I wanted was to be able to map, instead of problem solve technical issues.
So my recommendation would be to think very hard about purchasing or building a drone yourself. Building your own drone will cost you a lot less money (as long as you don't crash too many air frames during testing) and you'll learn a lot more about the technical workings of a drone. Purchasing will cost you more money but you'll be up and running and mapping sooner, you will have a refined and reliable system that produces results right away. Decide on what you are 'most poor' at, time or money.
 |
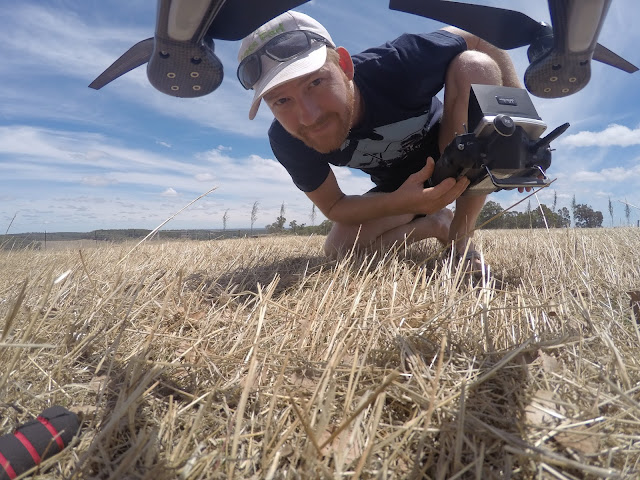
| The downside to building and testing your own drone |


